Deviation Actions

Hello everyone! I know it has been a bit over a month since the last journal entry, but as you can tell I’ve been a bit busy with everything. First off I want to thank everyone who got the chance to watch Steel Echo both here and elsewhere. With flash and this website feeling like they’re on the downhill, every comment means so much to me you have no idea <3. I’m also in the process of full-time freelance since I have since left my retail job in pursuit of better ventures. This might mean a lot more large projects to come as well as future openings, but I’ll get to that later. The big thing I wanted to share is more of a response to the many people asking ‘how do I take a larger animation project such as this and take it from storyboard to completed animation in the span of a few weeks. Today is a bit of a behind the scenes look at that. Of course for larger projects it is a bit more complex but the process is generally the same depending on scope.
A few weeks back, I sat down with the commissioner of this animation to help understand his vision a bit better. When it comes to animations, specifically commissions, I want to make sure I get the ‘feel’ that a commissioner wants, as I believe that animations should be designed to invoke a particular emotion.
Scoping the project is usually done by taking my overall ‘vision’ and crunching it down into producible scenes via storyboard while conferencing with the commissioner. The initial idea for “Steel Echo” was to have this robotic dragon character ‘breaking out’ of a holding facility while delivering the idea that the character was not an antagonist. This took my 30 second budget for intro animation and broke it into 7 distinguishable scenes, each only lasting a few seconds. These scenes can then be imported to a linear video editor to make sure the ‘feel’ of the timing is what the commissioner wants.
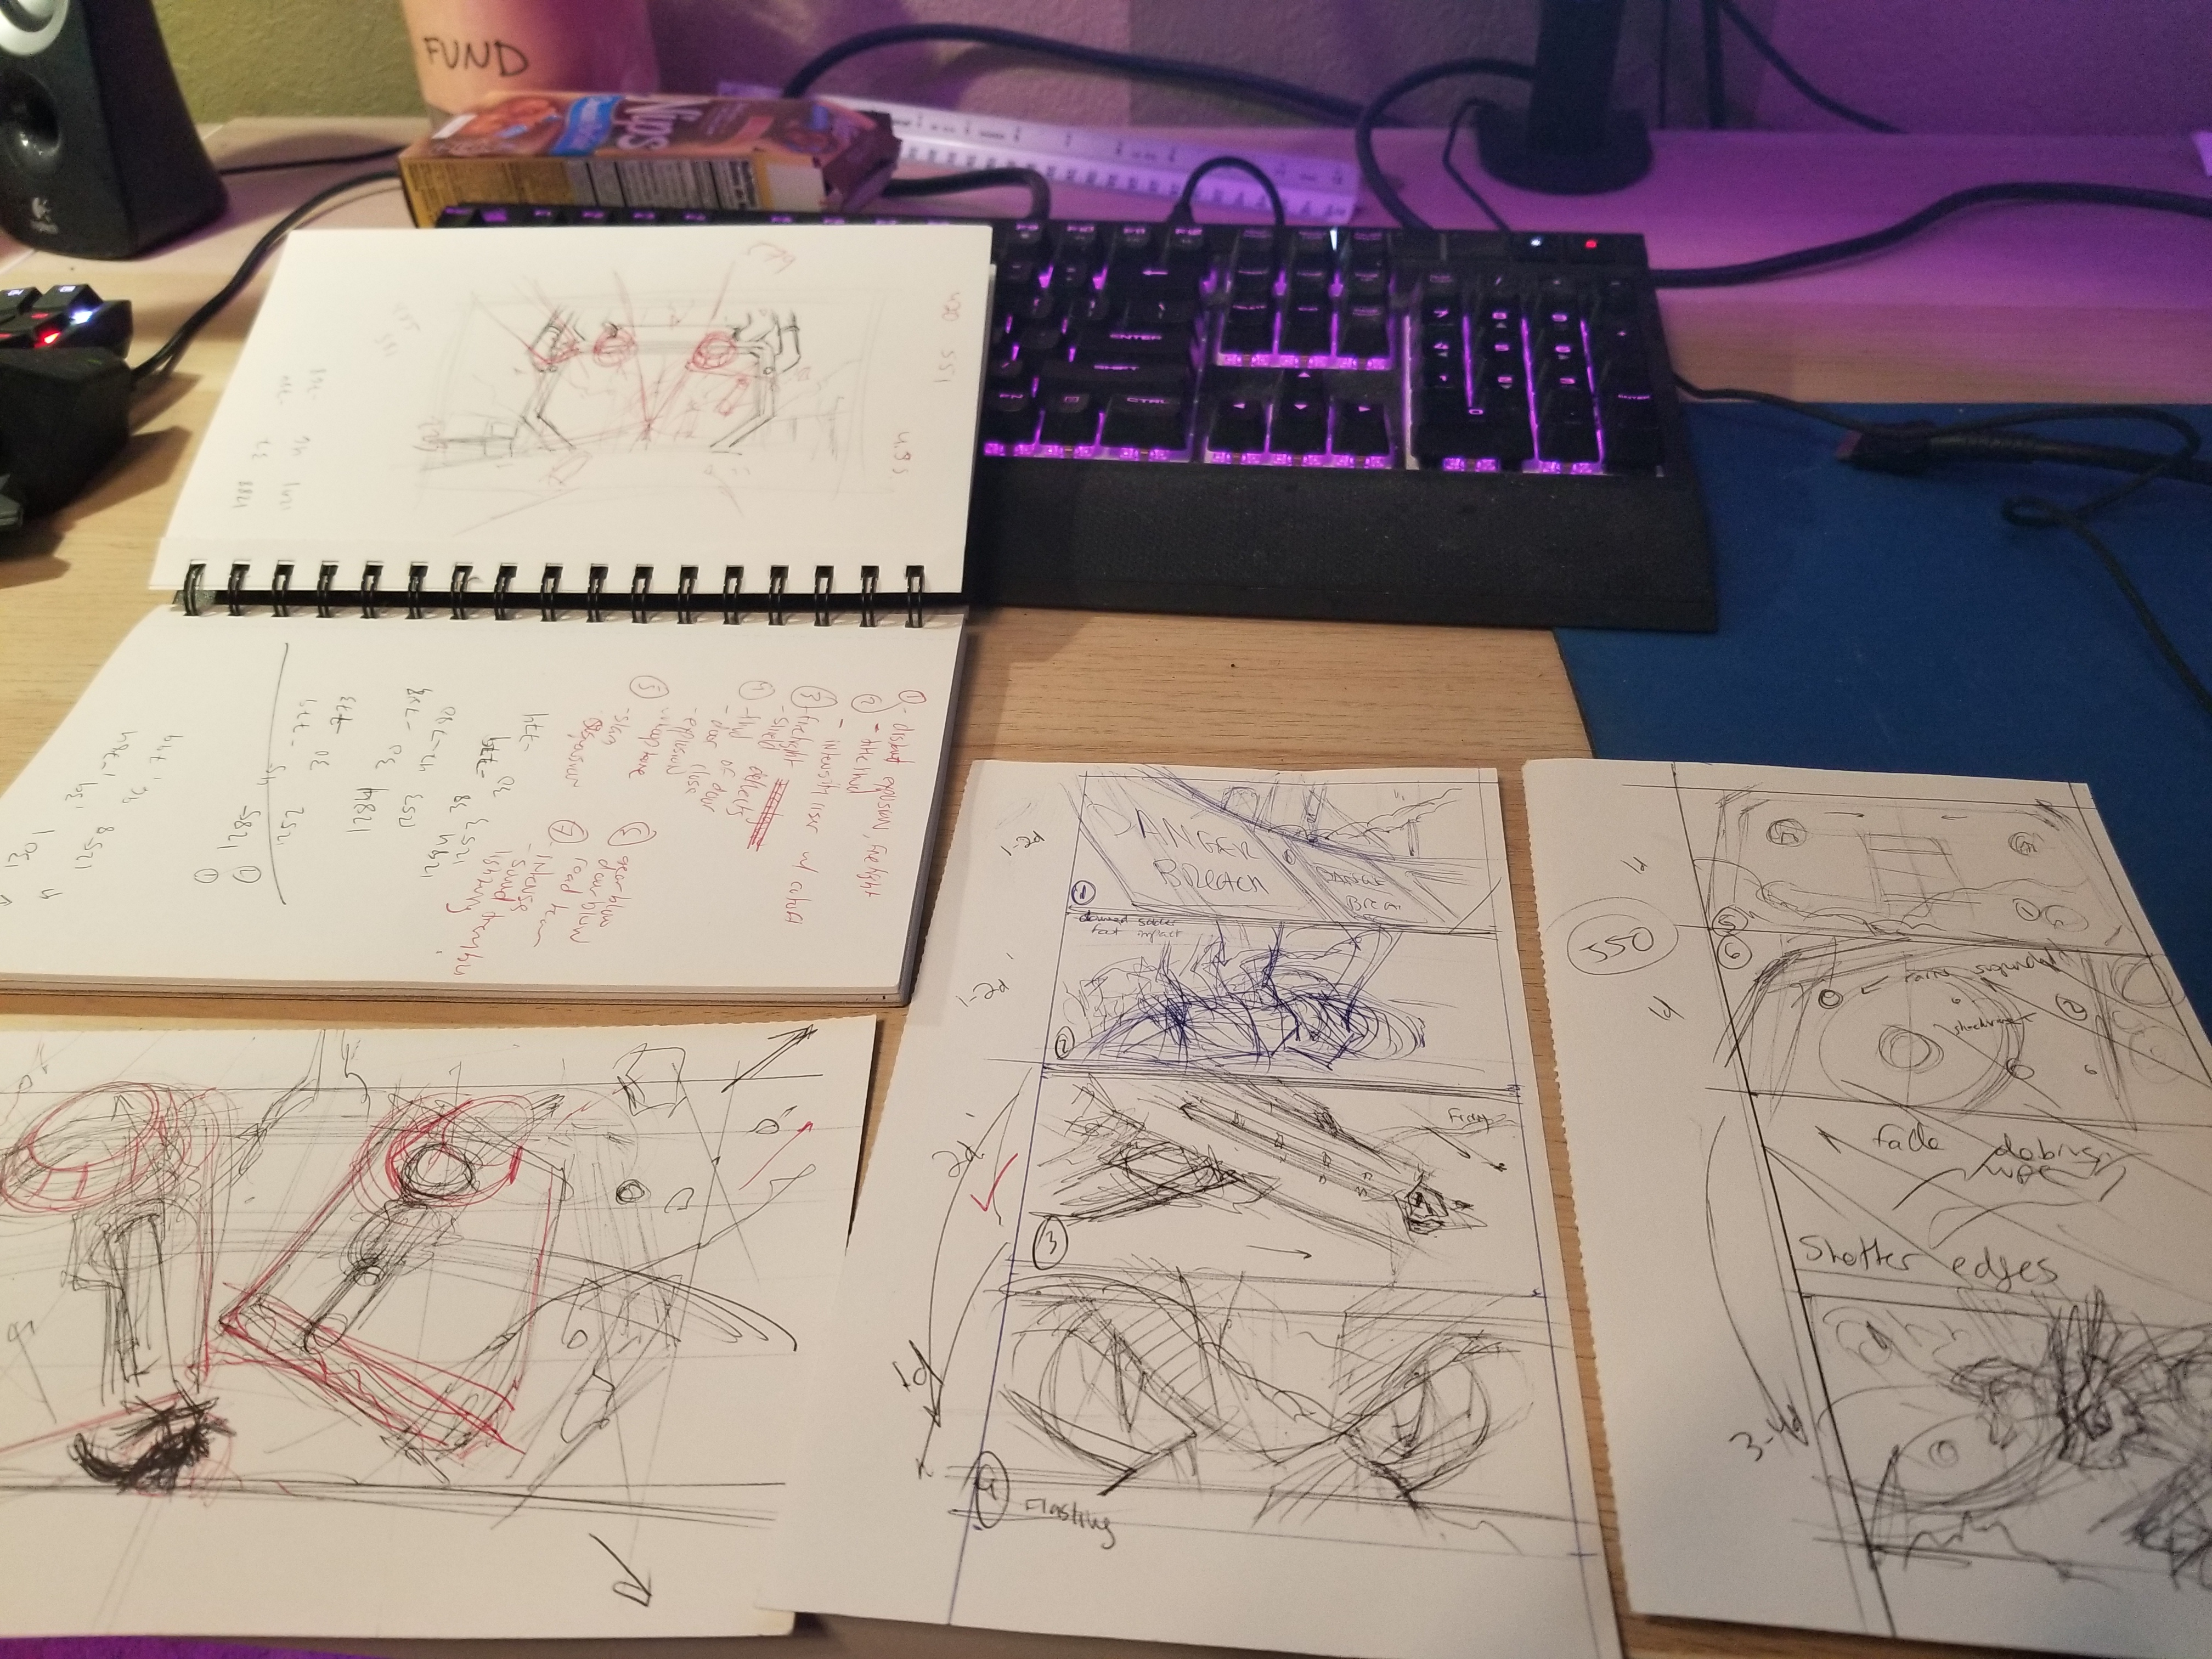
As you can see these are very rough and contain notes for motion.

After this approval phase, Each scene is given a very quick paint render to help get the proper ‘color feel’ for the final scenes. This also determines the palette which I want to use. I usually research a ton of animated cinematic work for this process, with one of my larger influences being the Blizzard Animations. Each animation produced by blizzard is able to captivate excitement within the span of a few seconds to a minute, which is exactly what I want to do with my own work. This helps me construct the pacing of the work as well as initial dialog for the character.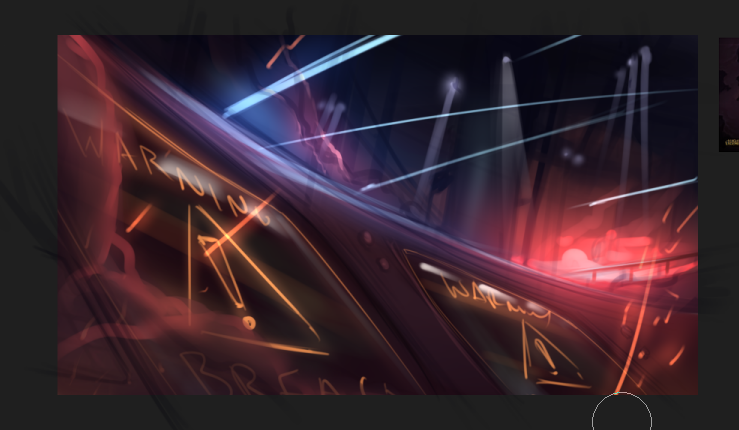
Below is a bit of a peek at the comparisons between my initial thumbnail designs versus their completed production renders.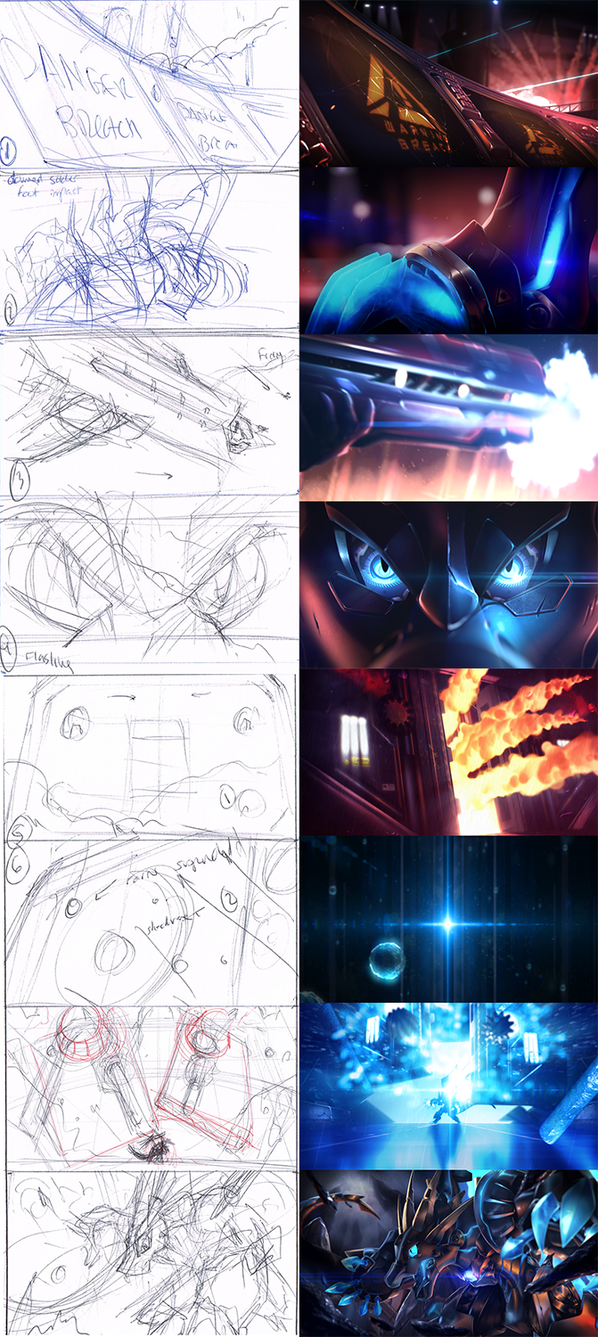
Scene 4 (Dragon’s Eyes): Probably the most popular teased scene based on twitter (ironically drawing more attention than the final animation), was the scene in which I show the character’s machine eyes coming to life. This scene ended up getting a few revisions due to the eyes not working properly but the final scene was constructed using the following methods.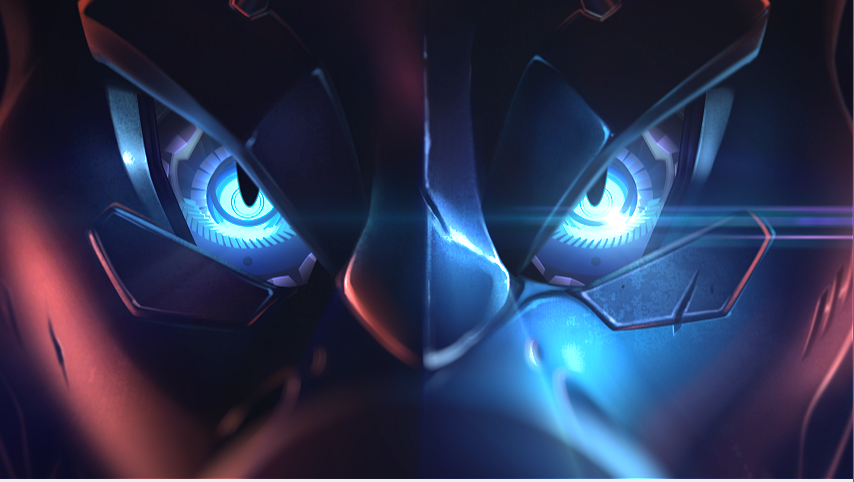
First off, the characters face, eyebrows, snout are all 2D painted assets with 3D ocular inserts created from several lens objects made in photoshop. These objects were positioned in a movable lens rig in such a way that I could control the pitch, yaw, roll, focus length, and rotation of every object. This rig was then adjusted to focus on timing cues and inserted into the back of each 2D eye cutout.
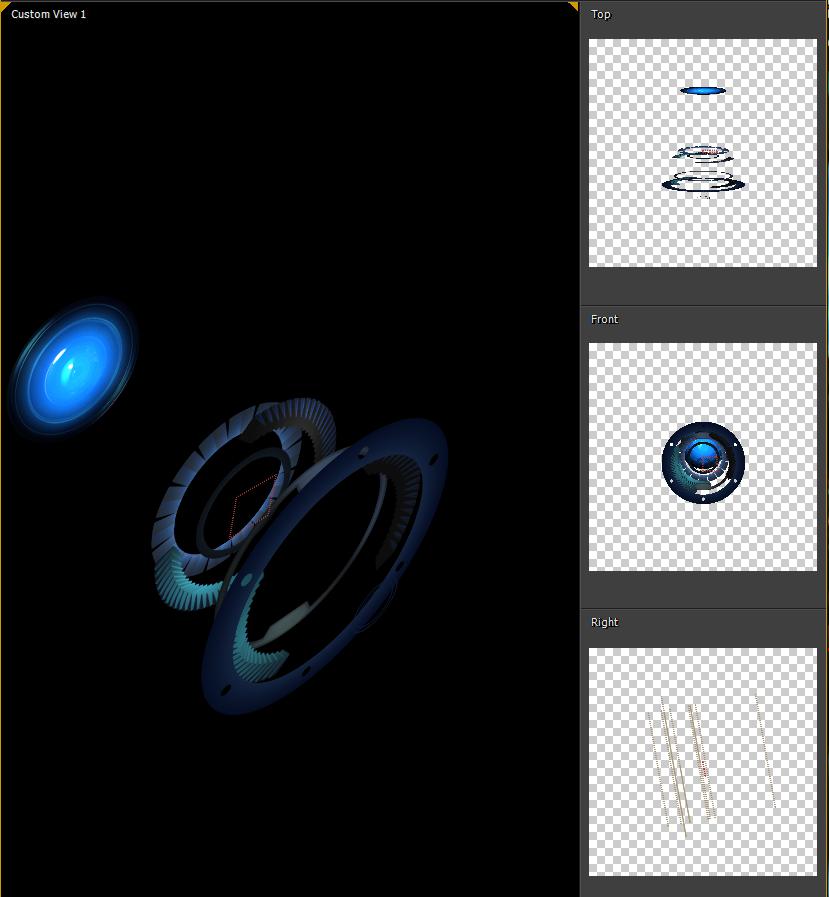
This rig was later reused for the final splash scene with the focal timings remapped to looping values. Combining this with glows positioned over the aperture gave the illusion of mechanical glowing eyes.
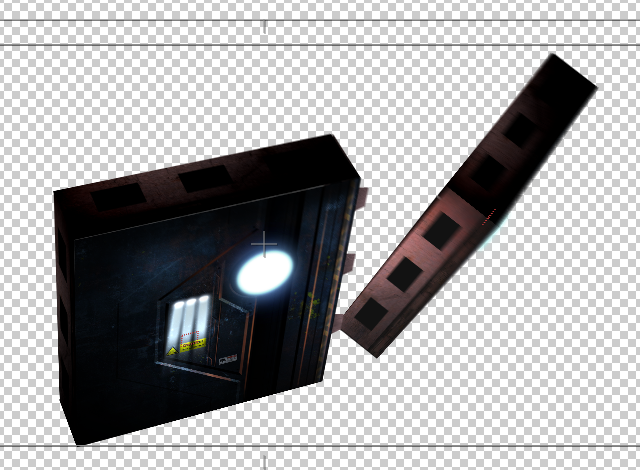
Scene 5-8(Blast Doors and Explosions): the blast door scenes were the hardest to animate due to the need for functioning doors that both slid closed, felt heavy, and could then be blown apart in the transition scenes to the final splash. The doors are a combination of 2D textures and 3D objects. The door textures were created in a few parts in Photoshop and contained ONLY the front and side faces of each door. I could then slide these using 3D layers in aftereffects and superimpose true 3D objects (the gears and piston cylinders) for the door explosion scene. The frame for the door was simply a painted 2D layer which I then shattered apart in the transition scene similar to the crystal explosion scene in the Freedom Planet 2 trailer created a few years back.
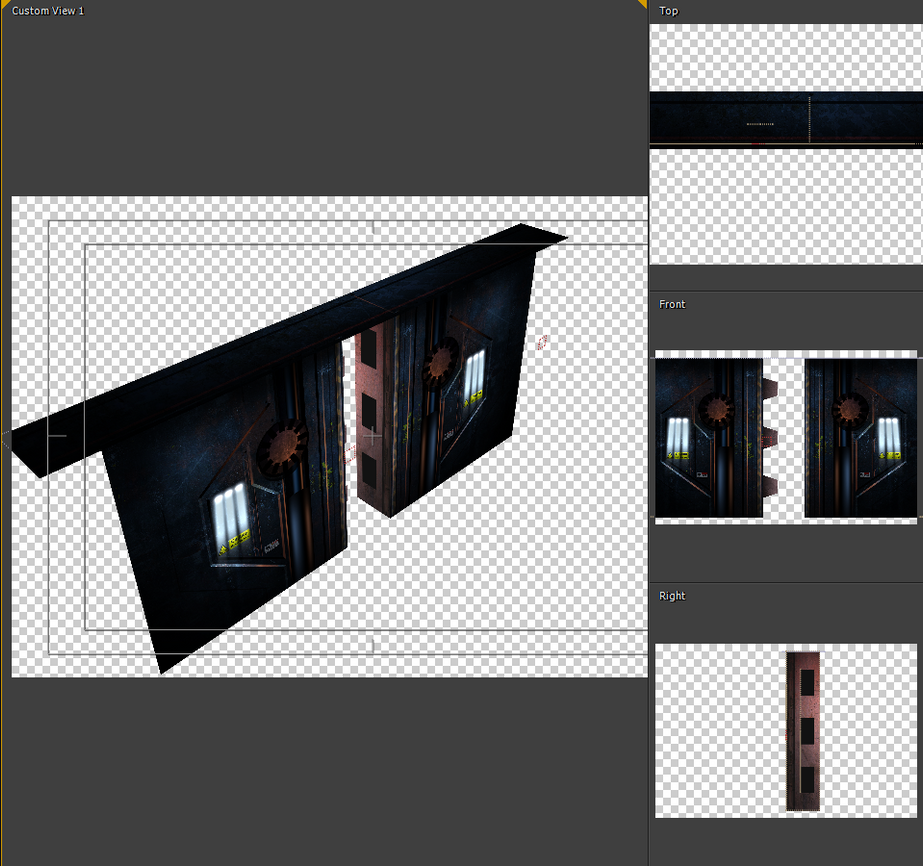
You can see how I am able to rotate the door objects off axis to simulate explosions.
The pyrotechnics of the closure scene were constructed in Trapcode’s particular with extensive modifications to bring the VFX into the proper style. Normally the particle systems are pretty unrefined and lack the ‘heat’ needed for the animation, so they were colorized, inverted, and adjusted so the physics, explosion nature, and temperature were closer to what I wanted.
The street in the final transition scene was then blown apart using a shatter layer on a 2d texture for the floor that was made in Photoshop. This exploding street is actually only visible and triggered about half way through the scene, with the seam for the exploding piece masked with blur filters and sneaky timing. Think of this whole snippit of scenes as a dynamic popup book featuring a crazy hodgepodge of 2D paintings, fireworks, and 3D objects.
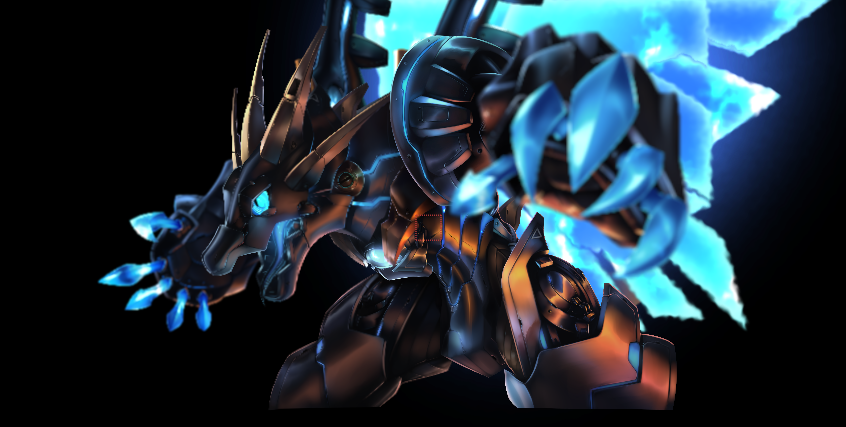
The final image was painted using Paint tool SAI and each moving part (head, arms, horns, eyes, etc) are separate to allow for moving, which makes painting the character rigs a bit tough. Each piece needs to be carefully checked to ensure it matches its connecting object and that consistency is what takes a bit longer than standard paintings.
[character body screens]
All of these pieces fit together like a complex moving puzzle with smaller invisible layers called null objects controlling position, rotation, and references to allow them to move as one entity. Smaller permutations are placed directly on these layers or within them to add further effects such as electrostatic effects, glows, puppet motion, etc. The whole rig is about 20 pieces; 6-7 major body parts with the most complex piece being the head due to the facial elements, jaw, horns, etc that need to move. It’s a particularly tricky balance between having enough pieces to feel organic once the painting moves but not too many so that it becomes confusing.
Overview
head with the jaw controllers visible
Once all these components are combined, the final loop has to loop successfully and therefore finding a good time interval with common multiples for effects is vital. I chose a 4 second loop (shorter than my usual loops) because 4 is easily divisible into handy integers and decimal places that allow for consistent looping. The worst loop length you can make is probably a prime number in length because it becomes impossible to do anything but 1 second motion loops.
This is one of the composition timelines. There were about 200 of these unique compositions each filled with other compositions filled with more compositions filled with...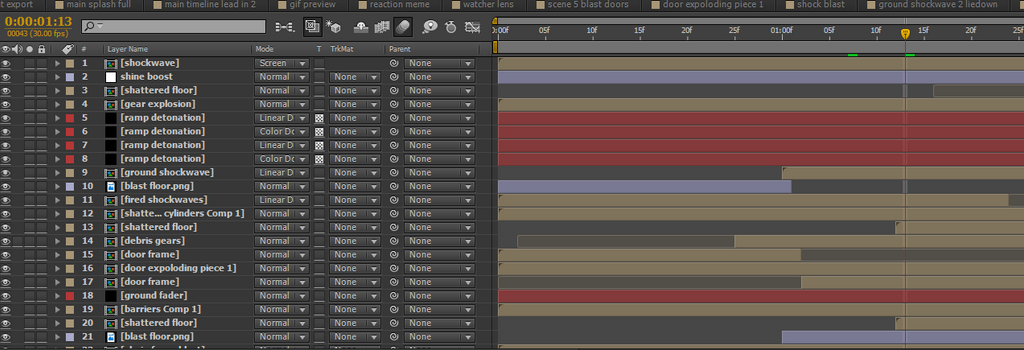
"lord help me..."
For these loops, all the start keyframes have to match their ending counterparts, so stuff like tail movement, body pieces, etc have to find nice clean intervals to operate. For example, the tail moves at .5 loops per second which means that it completes a smooth looping movement every 2 seconds, which fits well in the 4 second budget. The whole body has a 4 second loop cycle and the smaller objects have 1 second loops or smaller. EVERYTHING has to be a multiplicative to 4 (or whatever the loop is). There is a crazy amount of timing math that goes into these animations and that is only complicated further by having anything OTHER than base 30 fps. 30 is easy to keep track of because you can also divide that by 3 and have 10f loops. However, if you start getting into fps values like 25, 24, or other numbers, it gets complicated fast.
Anyway, once these individual clips are finished, they are then exported on their own into lossless .avi files and then reimported to allow for quick rendering and post fx, and then the entire project is exported to flash as a huge png sequence of about 1050 frames.
Sound work is completed in flash using event cues with the individual sounds edited in audacity. This takes me anywhere between 1-3 days depending on how much sound work needs to be done and I often create my own sound effects using conglomerates of other FX in my huge bin of fx files (I have a 41gb stash of stuff from both my old University’s Film department and MotionPulse by Videocopilot) as well as soundbible. Each sound fx is tailored for sound and length, making sure I don’t exceed the -0db threshold which speakers get mad. I also had Rowan perform his voice lines during this time and they were inserted into the project shortly after.
About 2.5 weeks after the storyboard and 80ish hours later, you have this! Sometimes these types of animations can be overlooked due to their short length or nasty load times due to flash preloaders (30mb limits on dA), but they are pretty extensive micro-productions that require a bunch of planning to execute. Advice if you want to get into this type of animation: start simple! Large projects can quickly get overwhelming but working up to the challenge over time is the way to get a feel for the pipeline. They are a ton of work, but not much beats seeing your screen blow open from a lil’ homemade cinematic and having your client (and friend) freak the hell out over watching it.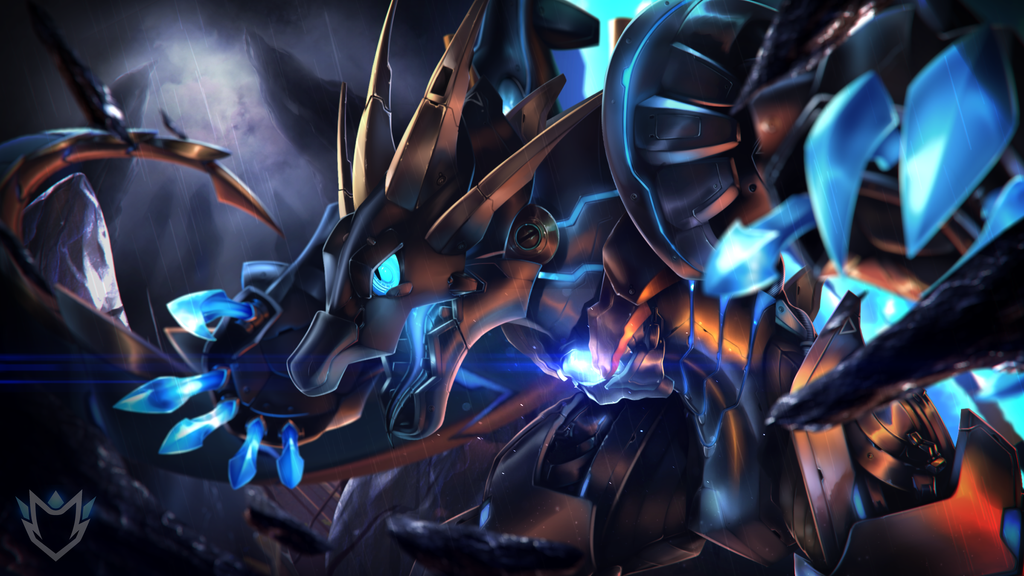
When I get a Patreon in the future, you can expect deconstructions like this after every project.
Oh, side note if you were able to make it all the way through this journal, I will be reopening commissions soon, so stay tuned. If you want to see more work in progress stuff and see the non-flash uploads, please come follow me on twitter! twitter.com/DanSyronArt
~Dan

Print Run PREORDERS open until July 14
will be mostly inactive here
a few months behind here.
Find me on Pillowfort
Last, since I didn't go to a film school or anything to learn after effects, I'm more or less self-taught. Are there any resources you use to think of different effects to create? I've got the rig side down more or less, I just need help on the effects side.